Knockdown Texture Application Step By Step
Understanding Knockdown Texture
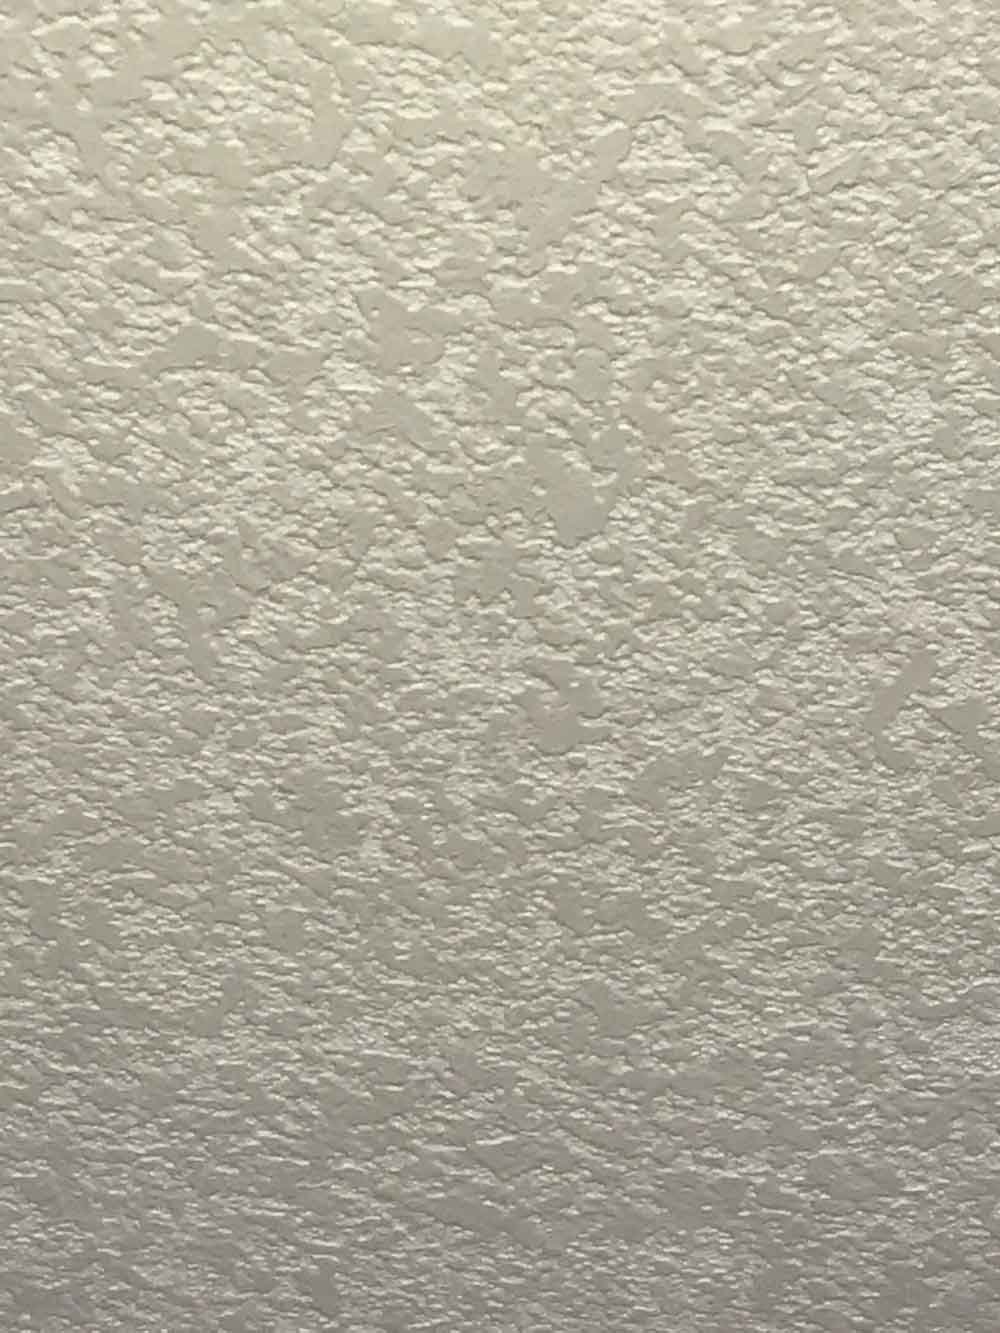
Knockdown texture is a popular technique used in drywall repair that results in a distinctive, tactile surface. This method involves applying a texture to the wall or ceiling and then partially flattening it, creating a unique visual effect. The appeal of knockdown texture lies in its ability to conceal imperfections on surfaces while introducing a visually stimulating design element that enhances the overall aesthetic of the room.
One of the primary benefits of utilizing knockdown texture is its versatility. Homeowners often gravitate towards this style due to its various visual appearances, which can range from subtle elegance to more pronounced and rugged looks. Depending on the application technique used—such as the density and pattern of the texture—the final result can tailor the feel of a space. In applications where light reflects off surfaces, knockdown texture can add an intriguing depth and character that simply painting can’t achieve.
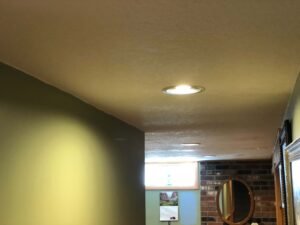
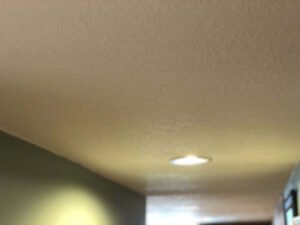
Common applications of knockdown texture include both walls and ceilings, making it suitable for almost any room within a home. This method not only provides an aesthetic upgrade but also serves practical purposes. For instance, textured surfaces tend to hide minor flaws and inconsistencies better than smooth finishes, which can make for a more forgiving and visually appealing wall or ceiling when viewed up close. Additionally, this technique can offer increased durability against dings and dents, particularly in high-traffic areas.
To effectively apply knockdown texture, specific tools and materials are typically required. Essential items include a drywall knife, hopper spray gun, and texture compound designed for this purpose. Understanding the procedure and mastering the technique can lead to beneficial improvements in drywall aesthetics, making it a valuable skill for any homeowner or contractor engaged in home repair or improvement projects.
Necessary Tools and Materials for Knockdown Texture
To achieve a professional finish. When applying knockdown texture to drywall, it is essential to gather the right tools and materials beforehand. This preparation not only streamlines the process but also enhances the overall quality of the texture application.
The first tool necessary for this project is a spray gun. A spray gun is crucial for applying texture evenly across the surface—this ensures uniformity in the design. It is recommended to use an air compressor with sufficient power to support the spray gun. Allowing for proper distribution of the joint compound.
Next, a mud pan will be instrumental in holding the joint compound as you work. A metal or plastic mud pan can help maintain a clean workspace. Making it easier to load your trowel with texture material.
An essential tool in the application process is the trowel. A knockdown trowel, usually made of stainless steel, features a wider blade to facilitate the desired texture effect. The angle and material of the trowel are important. They allow you to manipulate the compound effectively during the knockdown process.
In terms of materials, you will need a quality joint compound that is designed for texturing. A pre-mixed or quick-drying compound works well for knockdown applications. Alternatively, some people prefer using a lightweight compound for easier handling, especially when reaching overhead areas.
Finally, appropriate safety equipment such as gloves, goggles, and a respirator mask should not be overlooked, ensuring protection during application from dust and chemical exposure. By assembling these tools and materials, you will be well-prepared to master knockdown texture successfully.
Step-by-Step Instructions to Apply Knockdown Texture
Applying knockdown texture requires careful planning and execution, with a focus on each phase of the process to ensure a successful finish. First, prepare the surface you intend to texture. This involves cleaning the area to remove dust, debris, and any previous coatings that may interfere with adhesion. For best results, patch up any holes or imperfections in the drywall using a suitable joint compound and allowing it to dry thoroughly.
Next, you will need to mix the joint compound to the right consistency. Typically, a 50/50 mix of joint compound with water works well for knockdown texture applications. Carefully stir the mixture until it achieves a creamy texture, avoiding lumps that could ruin the finish. Once prepared, pour the mixture into a paint tray for easy access.
Apply The Texture Evenly
The next step is to apply the texture onto the wall using a knockdown knife or a large brush. Start from the top corner of the wall and work your way down, applying even pressure to distribute the compound evenly. It’s crucial to maintain a consistent pattern to achieve a uniform appearance. Allow the applied texture to set for about 10 to 15 minutes, or until it begins to lose its sheen.
Following the setting time, use a knockdown knife to gently flatten the peaks of the texture. Employ a slight angle when doing this, as it will create a smooth surface without removing too much texture. Aim for a staggered pattern with your strokes to ensure a natural look. Common mistakes to avoid include applying too much compound at once or knocking down the texture too soon, which can lead to an undesirable finish. By adhering to these steps and tips, beginners can successfully master the art of applying knockdown texture, enhancing their drywall repair skills.

Finishing Touches and Clean-Up
Once you have applied the knockdown texture to your drywall, the next crucial step is to allow it to dry completely. Drying times can vary depending on factors such as the humidity in your environment and the thickness of the texture application. Typically, you should allow the texture to dry for at least 24 hours before proceeding with any painting or additional finishes. To ensure proper drying, maintain good ventilation in the space by opening windows or using fans.
If you wish to paint the textured surface, it is advisable to choose a paint that complements the textured finish. Begin by priming the texture; this helps to create a smooth surface for paint application and enhances the paint’s adhesion. Using a roller, apply the first coat of paint, ensuring even coverage across the entire area. Depending on your chosen color and finish, you may need to apply a second coat once the first is fully dry.

Paint After The Texture Is Dry
After the painting is complete, it is essential to clean your tools and workspace to maintain a tidy area. Use warm, soapy water to clean any brushes and rollers, as this will prolong their lifespan. For larger tools, such as sprayers or trowels, follow the manufacturer’s instructions for effective cleaning. Once everything is clean, safely store your tools to prevent damage or wear.
In addition to the immediate clean-up, take some time to understand the maintenance needs of your newly finished knockdown texture. Regularly inspect the surface for any signs of damage or wear and address any issues promptly. Gently washing the surface with a damp sponge can help remove dirt and maintain the texture’s appearance. By following these steps and tips, you can ensure your drywall repair remains visually appealing and functional for years to come.
FAQ
How Large does the air compressor need to be?
I use a compressor that is rated at 5.3 CFM at 90psi
How thin does the joint compound need to be?
I thin it down to pancake batter consistency.
How long do you wait to knock down the texture?
It depends on the temp and humidity. Once the knockdown knife doesn’t wipe too deeply into the texture.
Can I add paint to the texture mix?
Yes its common to mix in paint, but you should prime and paint the drywall before texturing if adding paint.
Unless you plan on also painting over the texture after it is dry. In that case, the added paint isn’t doing anything
useful. If spraying knockdown on the walls, the paint can make the texture tougher and more abrasion-resistant.